
In my previous post I described how to use vRA 8’s native functionality to apply an NSX-T tag to a VM’s logical port. In this post I will describe how you can use vRA’s ABX platform to create a python script to apply a tag to VM object in NSX-T. Many customers I have worked with prefer to apply tags at the VM level instead of the logical port level so I created this script to enable those customers to continue working as they always have. There will be screenshots in this post but you can access the script from my github page here.
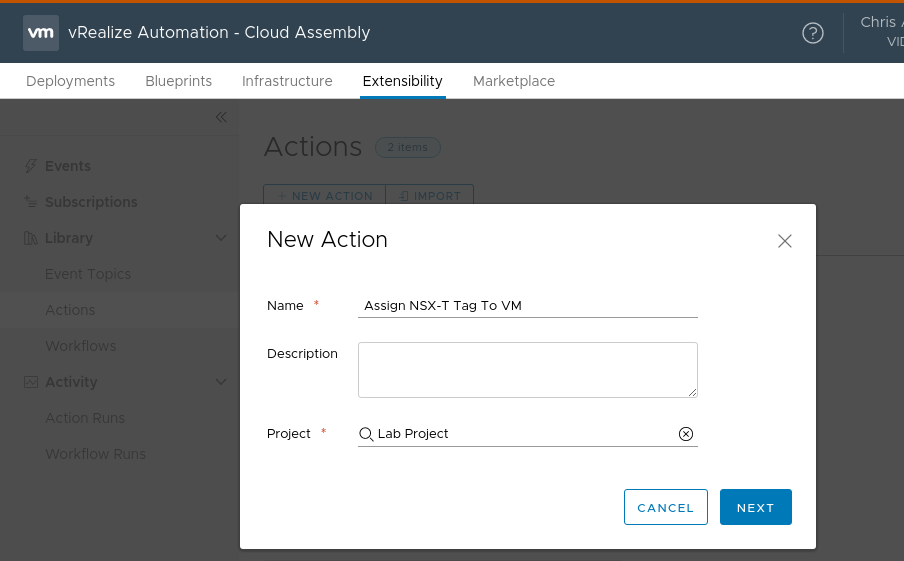
The 1st thing we need to do is create a script definition in vRA. To do this, navigate to Cloud Assembly->Extensibility->Actions and click the new action button. Give the new action a name and associate the action with a project. Click next to create the action.
After clicking next you will be presented with the script definition editor. There are a couple of important things to note in here. As highlighted below, we will be creating a python application (the other option is Node.js). Secondly, we are using the default “handler” function as our main function. You can think of this as main() in a C program or simply as the place our program will start from. All of our properties and deployment information will be passed to the handler function at execution time.
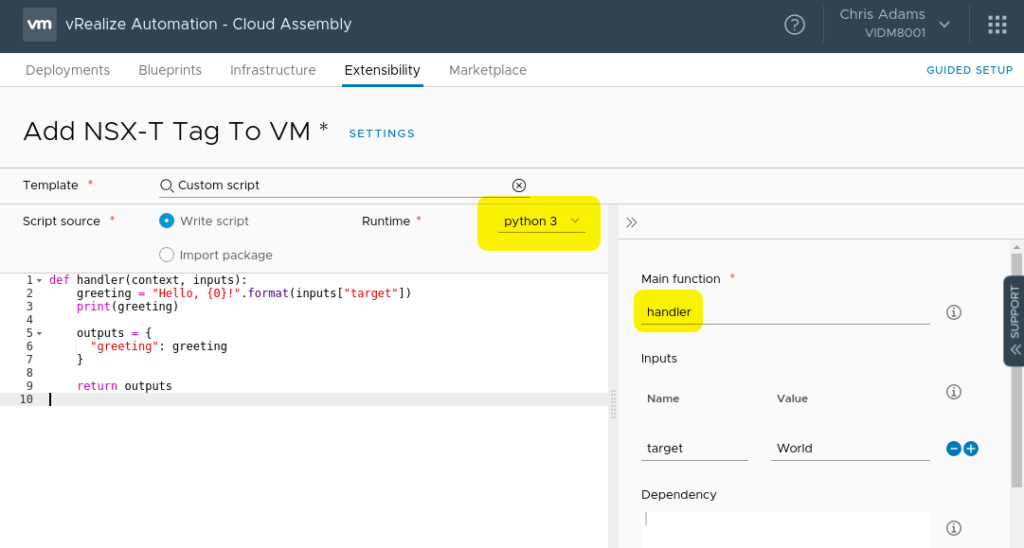
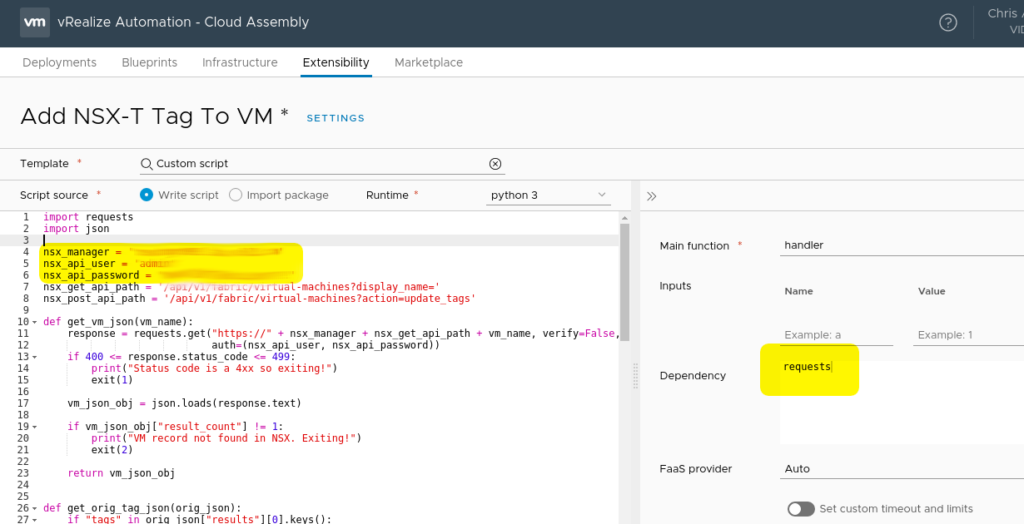
The default code in the script definition will simply print “Hello, World!” when the script is executed. Kinda fun but not really helpful for out exercise. At this point you can go ahead and get the add_nsx-t_tags_to_vm_abx.py script from the NSX-T python section of my github page. Take the contents of the script and paste it into the script definition pane (make sure to erase or overwrite the hello world code). Edit the script definitions to reflect your nsx manager, nsx manager user and password. You will also see that there are 2 import statements at the top of the script. JSON and requests are required for this script. Since the requests library isn’t included with the python environment in ABX, it needs to be pulled at runtime so we add a dependency on the right side of the page. See the screenshot below for an example.
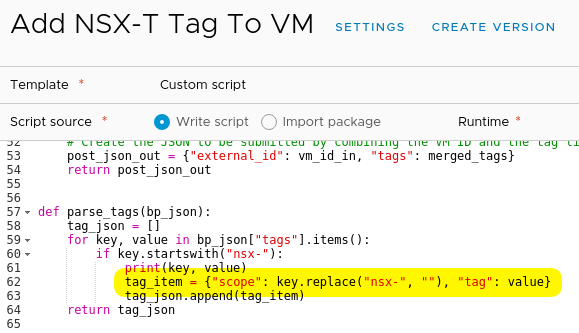
We are almost done with the script definition but its important to point out that this script expects tags to be defined in a specific format. The tags should be added to vRA in the format of nsx-tag:value. So, if the tag is defined as nsx-os:linux, the VM will be tagged in vCenter with nsx-os:linux and in NSX-T as os:linux. This is useful so you can easily see in vCenter that there is a NSX tag applied to the VM. The script strips off the nsx- portion of the tag name before adding the tag to the VM in NSX. This is accomplished in the parse_tags function. If you want to change this behavior, you can change the line highlighted below.
Now that we have the script definition done, click on the save button and then close.
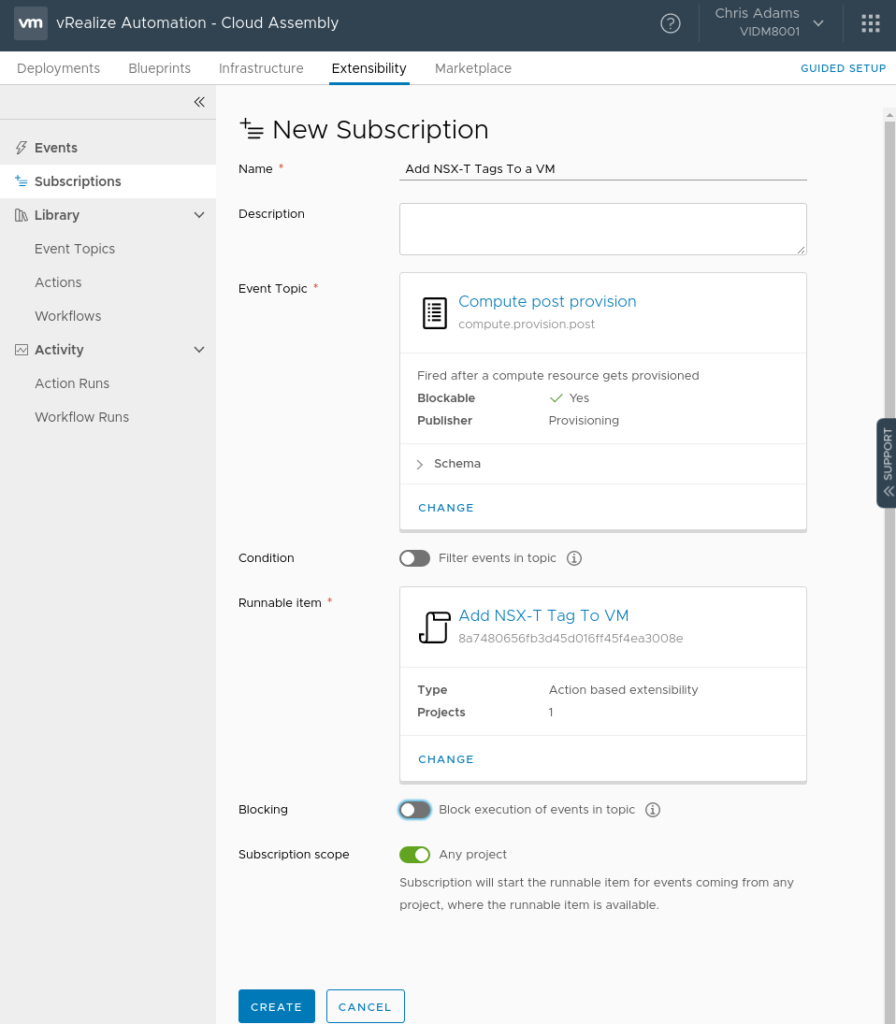
We now have to create a subscription to execute the script when we provision a VM. Navigate to Cloud Assembly->Extensibility->Subscriptions and click the “New Subscription” button. Give the subscription a meaningful name, set the event topic to “Compute post provision.” This will ensure the tag is applied after the VM is provisioned and will be in the NSX-T inventory. Set the runable item to be the script we created. Click the “Create” button.
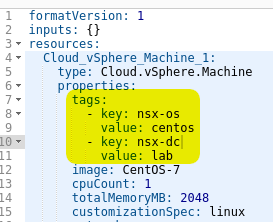
We are now ready to ensure our blueprint has the proper tag definitions. In the vSphere Machine properties we will add a tags: definition containing our nsx- tags. In the following screenshot I have an operating system (nsx-os) and datacenter (nsx-dc) tag defined. You can use whatever tags your environment uses. As long as it has nsx- in the tag name, it’ll apply.
Save the blueprint and test a deployment.
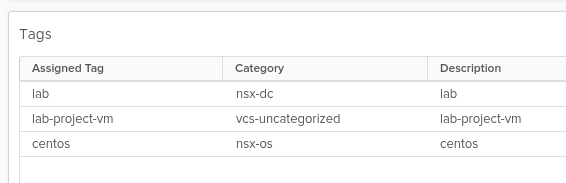
When the deployment is complete you should see the tags applied to the VM in vCenter with the nsx- name still in place so we know the VM has some tags in NSX.
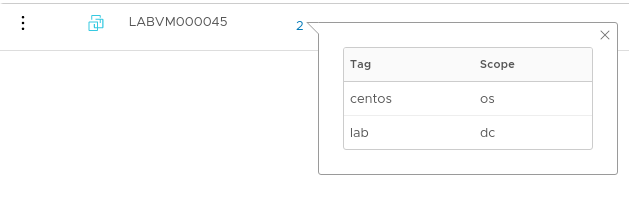
In NSX-T you should see the VM in the inventory and it should have the tags that were defined in the blueprint but this time without nsx- in the tag name.
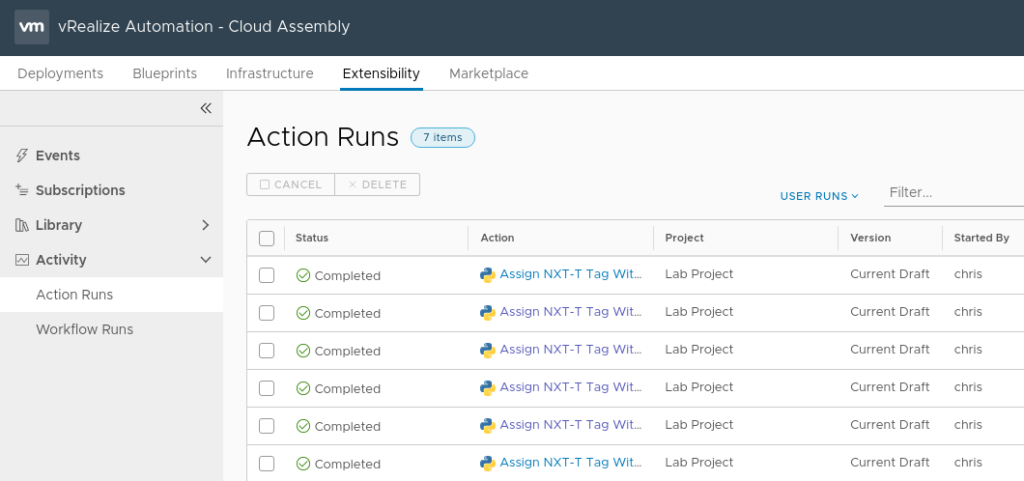
If anything went wrong, you can review the script run and examine the script output in the “Action Runs” tab in the Activity section of Cloud Assemblies extensiblity section.
Hopefully this post was helpful. If you run into any issues or have questions/comments, please leave them below.
I would think it better to use vRO in this case. In your script there is a cleartext admin password for the NSX-T. At least in vRO thats hashed out and stored secure…..
Using vRO is definitely possible. This example was to show how ABX can be used. You could also have the password stored in a vault somewhere and pull from there. There are lots of options.