Using old disks to serve data using a VM and Linux software RAID on CentOS or Red Hat 7

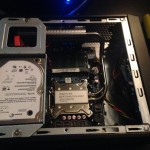
I have been contemplating adding a 2nd NAS storage device to my home network for a while. I currently have a Netgear ReadyNAS 2100 system with 8 TB raw storage. The ReadyNAS works terrific but I have a few old hard drives laying around and I want to use them! I looked online and considered building an inexpensive Linux box and using md RAID (Linux software RAID). I could then share the disk via NFS, AFP, SMB or iSCSI, or any combination of them. After thinking about the options I decided to go another route. I have an ESXi host that I use for my admin systems (vCenter, vShield Manager, Domain Controller, etc.). This system is in a very empty case since it boots from an 8 GB USB stick. The motherboard on the system has 6 SATA ports and the PSU is plenty powerful enough to add some disks! I decided to throw a few of my spare HDD’s into the system, format them as VMFS and connect them (via a single large VMDK) to a CentOS 7 VM. I decided to start with 2 disks I had handy. A 750 GB Seagate and a 1 TB Western Digital. Both are 7200 RPM SATA 6. I created my CentOS 7 VM and then created two 600 GB disks for the VM. One of the disks is stored on the 750 GB and the other is on the 1 TB. I then set out to create the RAID volume and format it for Linux use.

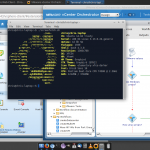
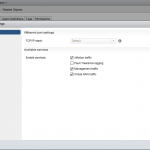
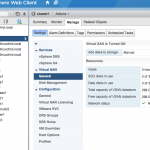
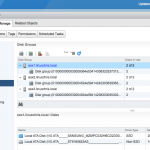
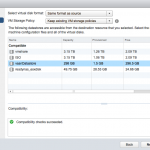
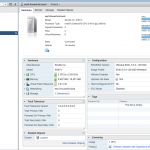
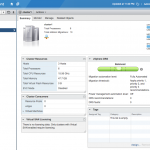
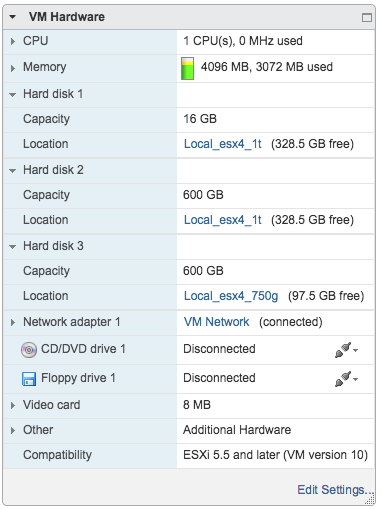
Here is what the disks look like from a VMware perspective:
nas1_hardware

I needed to install the Linux software RAID management tools:

[root@nfs1 ~]# yum install mdadm

Find out where your 600 GB "disks" are (they are sdb and sdc on my VM):
[root@nfs1 ~]# cat /proc/partitions
major minor #blocks name

2 0 4 fd0
8 0 16777216 sda
8 1 512000 sda1
8 2 16264192 sda2
8 16 629145600 sdb
8 32 629145600 sdc
11 0 1048575 sr0
253 0 1679360 dm-0
253 1 14581760 dm-1

Create the RAID volume using the 2 disks from above. Note that I am configuring them as RAID-1 (mirrored). If you have more disks available you can do RAID-5, RAID-6, RAID-10, etc. You can also add spares if you want.
[root@nfs1 ~]# mdadm --create --verbose /dev/md0 --level=mirror --raid-devices=2 /dev/sdb /dev/sdc
mdadm: Note: this array has metadata at the start and
may not be suitable as a boot device. If you plan to
store '/boot' on this device please ensure that
your boot-loader understands md/v1.x metadata, or use
--metadata=0.90
mdadm: size set to 629014336K
Continue creating array? y
mdadm: Defaulting to version 1.2 metadata
mdadm: array /dev/md0 started.

Now you wait… Building the RAID array takes some time. Start it up before you go to bed. 🙂
[root@nfs1 ~]# cat /proc/mdstat
Personalities : [raid1]
md0 : active raid1 sdc[1] sdb[0]
629014336 blocks super 1.2 [2/2] [UU]
[>....................] resync = 0.4% (2818944/629014336) finish=464.2min speed=22478K/sec

unused devices:

When it is done, you should see something like this:
[root@nfs1 ~]# cat /proc/mdstat
Personalities : [raid1]
md0 : active raid1 sdc[1] sdb[0]
629014336 blocks super 1.2 [2/2] [UU]

unused devices:
[root@nfs1 ~]# mdadm --detail /dev/md0
/dev/md0:
Version : 1.2
Creation Time : Sat Jan 31 20:46:40 2015
Raid Level : raid1
Array Size : 629014336 (599.87 GiB 644.11 GB)
Used Dev Size : 629014336 (599.87 GiB 644.11 GB)
Raid Devices : 2
Total Devices : 2
Persistence : Superblock is persistent

Update Time : Sun Feb 1 05:21:18 2015
State : clean
Active Devices : 2
Working Devices : 2
Failed Devices : 0
Spare Devices : 0

Name : nfs1:0 (local to host nfs1)
UUID : e53b81cf:1b1e55a3:729e9b12:160b8aa3
Events : 104

Number Major Minor RaidDevice State
0 8 16 0 active sync /dev/sdb
1 8 32 1 active sync /dev/sdc

Now, create a file named /etc/mdadm.conf and add the following (adjust for your disks):
DEVICE /dev/sd[bc]
ARRAY /dev/md0 devices=/dev/sdb,/dev/sdc

You will want to be notified if a disk fails in the array.
mdadm -F -f --mail=linuxchris@gmail.com --delay=1800 /dev/md0

Make sure the monitor starts up on system boot by adding this line to /etc/rc.d/rc.local (yah, yah… I know, systemd blah blah, no more rc.local, blah blah. It still works and its easy). This assumes email works on your server, if not you will need to get that workikng. Google it. 🙂
mdadm -F -f --mail=linuxchris@gmail.com --delay=1800 /dev/md0
If you are on RedHat or CentOS 7, you will need to do this too:
chmod +x /etc/rc.d/rc.local

Now we need to put a filesystem on it. I like to use ext4 but you can use any filesystem you want.
mkfs.ext4 -m 1 /dev/md0
(the -m 1 option sets “root reserve” at 1%. By default, this is higher but since this is just a data drive, it can be set low.)

Make a directory to mount the new disk (I’m using /data):
mkdir /data

Add a new line to the bottom of /etc/fstab so the disk its mounted every time the VM boots. You could add options like noatime, etc. but since this is a home lab and I dont care about performace tweaks, we will not:
/dev/md0 /data ext4 defaults 1 1

Mount the disk:
mount /dev/md0 /data

Thats is. Now you have the device ready for use. In an upcoming article, I will discuss exporting the volume via NFS as well as creating an iSCSI target on the volume. Finally, I hope to be able to show how to set up a Time Machine backup target so you can back up you Mac computers to the shared volume.

Posted in Linux, Sysadmin | Leave a comment

Burning a Linux boot ISO to a USB drive on a Mac.

I always forget the exact commands to use when I have to burn a Linux ISO to a thumb drive on my MacBook Pro. I am burning a SuSE boot ISO in the example but this procedure should work for just about any ISO. These instructions work for me but remember, dd will erase EVERYTHING on your drive. Use it with caution. I am not responsible if you screw something up.
1 – Insert the USB thumb drive (or SD card or whatever) and run:
diskutil list
2 – Determine the disk identifier (in this example its /dev/disk2):
new-host-5:~ chris$ diskutil list
/dev/disk0
#: TYPE NAME SIZE IDENTIFIER
0: GUID_partition_scheme *1.0 TB disk0
1: EFI EFI 209.7 MB disk0s1
2: Apple_CoreStorage 790.7 GB disk0s2
3: Apple_Boot Recovery HD 650.0 MB disk0s3
4: Microsoft Basic Data BOOTCAMP 209.0 GB disk0s4
/dev/disk1
#: TYPE NAME SIZE IDENTIFIER
0: Apple_HFS Macintosh HD *790.4 GB disk1
/dev/disk2
#: TYPE NAME SIZE IDENTIFIER
0: FDisk_partition_scheme *2.0 GB disk2
1: DOS_FAT_16 THUMBDRIVE 2.0 GB disk2s1

3 – Unmount the disk:
diskutil unmountDisk /dev/disk2
4 – Burn the ISO to the USB drive (BE CAREFUL HERE!!!!). This step will take a while and dd is infamously quiet while its running. It hasn’t hung… Just give it time. If you want to see the activity you can open another terminal and run iostat -d 3 and watch the activity in real time 🙂
sudo dd if=Downloads/openSUSE.iso of=/dev/disk2 bs=1m
5 – If the USB drive is mounted after dd finishes, unmount it and you are done…
diskutil unmountDisk /dev/disk2

Posted in Linux, Mac | Leave a comment

Repair a vCenter SQL Express Database

The day before yesterday the power flickered at our house and because I had procrastinated installing a UPS in my home lab, my systems all powered off unexpectedly. Yesterday I went out and bought the UPS and powered everything back on but my vCenter instance was throwing SQL errors all over the place in the event logs. I looked for a quick “how to” for repairing the vCenter SQL Express DB but was unable to find anything specific to vCenter. Here is what I did.

    Please remember, this is only a lab and you should always call support or talk to your DBA before doing something like this in production. This specific SQL query can loose data in your vCenter database!

1) Install SQL Server Management Studio. Just search Google for it but make sure to download the same version as your SQL Express instance.
2) Connect to the SQL Server instance. The instance you connect to is “.\VIM_SQLEXP” without the quotes.
3) You will probably see something like the following, note the VIM_VCDB is marked as suspect.

4) Select the VIM_VCDB database.
5) Paste the following into the Query area and click execute:

EXEC sp_resetstatus VIM_VCDB;
ALTER DATABASE VIM_VCDB SET EMERGENCY
DBCC checkdb(VIM_VCDB)
ALTER DATABASE VIM_VCDB SET SINGLE_USER WITH ROLLBACK IMMEDIATE
DBCC CheckDB (VIM_VCDB, REPAIR_ALLOW_DATA_LOSS)
ALTER DATABASE VIM_VCDB SET MULTI_USER

6) Wait. This make take a while, it took about 45 seconds on my system.
7) Refresh the view and you should see the following. Note that the “Suspect” status is gone.

8) Restart vCenter or just reboot the host if everything is running on the same box/vm.

Posted in Home Lab, vCenter, VMware | Leave a comment

Linux Desktop for VMware Administration

I recently replaced my daughters aging Toshiba laptop with a used MacBook Pro. The MacBook Pro was much faster and she reallylikes working in OS X so it was a great fit for her needs. With the freeing up of the old Toshiba, I thought I’d install a recent Linux distro and see if the vSphere web client and the vCO Java client worked well enough to use regularly. I had problems in the past with my Fedora 17-19 desktops due to Flash and Java incompatabilities but I figured I’d give it a shot.
Since Ubuntu had a new LTS release this week I decided to give Trusty a spin. I am not a fan of Unity or Gnome 3 so I grabbed an xubuntu (XFCE desktop) iso and installed it on my newly aquired old laptop. Not suprising, the laptop has been runing very stable and feels very snappy under XFCE. I am not an Ubuntu/debian guy so I did some quick Googling and found out how to get some of the needed packagesinstalled. Coming from a Fedora/CentOS/RHEL worls, I can never remember the package names under Ubuntu/deban. Here is what I ran to get Java, Silverlight and Flash:

sudo apt-get install icedtea-7-plugin openjdk-7-jre
sudo apt-add-repository ppa:pipelight/stable
sudo apt-get update
sudo apt-get install pipelight-multi
sudo pipelight-plugin --enable silverlight
sudo pipelight-plugin --enable widevine
sudo apt-get install pepperflashplugin-nonfree
sudo update-pepperflashplugin-nonfree --install

With that done, I installed some other things I wanted like Chrome, VLC, Eclipse, etc. They are not needed (neither is Silverlight) but I like to have them available.

Once everything was installed to my liking, I decided to fire up the vSphere web client. Much to my suprise, it worked perfectly. I could even open a remote VM console via Chrome! With that working, I decided to connect to vCO and give it a try. vCO is a Java app that has worked in Linux in the past for me and I was happy to see that is still works without issue under IcedTea.

The laptop is kinda old but its not too slow. It has 4 GB RAM so I could install a Windows 7 VM for the times I need PowerCLI or have to fire up the old C# client. The only real issue I have with it is the awful resolution on the cheap LCD. It does have a VGA port and I do have a 27″ monitor, so that could always work.

If you are thinking of trying Linux as a primary desktop for day to day admin work, it may be the right choice. I think I’ll be keeping this one around!

Please note: I am a VMware employee but this is not a VMware blog. My postings are my own and don’t necessarily represent VMware’s positions, strategies, or opinions.

Posted in Home Lab, Linux, vCenter, VMware, vSphere | 4 Comments

VSAN in the home lab

Today I received the 3 mSATA drives I bought from eBay with some NCAA tournament winnings. I got the cheapest mSATA drives I could find which ended up being 32 GB Samsung disks for $25 each with free shipping. I think they were produced for either a Thinkpad or HP laptop but it does not matter, they are standard mSATA and seem to work great. I had 3 old laptop (non-SSD) hard drives laying around the house (what person working in IT doesn’t?), so those were free but you can probably get 80-120 GB laptop SATA disk real cheap on eBay or Craigslist. I now have a VSAN config that works great so far. I would like to add another Gig-E switch to the cluster and use the 2nd NIC in each host for VSAN traffic but I have to search around for a good deal on craigslist or ebay. 🙂
So, here is what I did and there are some pictures as well so you can see what things look like (if you care). Please remember, this is for TESTING purposes, there is no way you should use this kind of setup in a production environment of any sort! I am a VMware employee but this is a blog post about a personal lab and no-one should expect VMware (or anyone else) to support a configuration like this.
1. vMotion the VM’s off of the ESXi host, put it in maintenance mode and then power off the ESXi host.
2. Install the mSATA disk and the SATA (non-SSD) disk and power the host back up.
3. Once the host shows up in vCenter take it out of maintenance mode and repeat the process with the other hosts in the cluster.
4. Once all the hardware work is done, verify you can see the newly installed disk in each host.
* Note, some of the old drives I used had existing filesystems on them. Before I could use them in the VSAN cluster, I had to format them with VMFS then delete them from the host inventory. Once I did that, everything went smoothly. *
5. Enable VSAN traffic on your VMkernel adapters on all ESXi hosts that will take part in the VSAN cluster.
6. Add your VSAN license, if you dont have one it should default to a 30 trial license.
7. In the settings section of the Manage tab in the cluster properties, enable VSAN. You will be presented an option to automagically pull in all available disk or do it manually. I selected the manual method but the auto method should work fine too. Just be sure to review what is being imported to make sure you don’t use the wrong disk accidentally.
8. Use your new VSAN disk! As you can see in the attached screenshot of a storage vMotion, the VSAN datastore shows up as an available datastore.
Enjoy!

Posted in ESXi, Home Lab, VMware, VSAN | Leave a comment

Home Lab Updated

Since starting my new job at VMware I thought it would be a good idea to beef up my home lab a bit so I can test as much as possible at home. My lab had previously contained the following:
2 x Shuttle XH61V systems with 12 GB RAM and a dual core Celeron CPU
1 x NetGear ReadyNAS 2100 storage system with 4 x 2 TB hard drives
Storage was provided via iSCSI and NFS from the ReadyNAS
The hypervisor was a custom spin of VMware ESXi 5.5 with vCenter 5.5u1. The custom spin of ESXi is needed to address ESXi 5.5 lacking a NIC driver needed for the XH61V. Ryan Birk has a great step-by-step guide to building the ISO if you are so inclined.
The lab was working well but RAM was tight and I wanted some more cores. I could have bumped the RAM in each host to 16 GB and upgraded the CPU to an i5 or i7 but I thought it would be best to add another host as well as bump the RAM up.
The lab is now running the following:
3 x Shuttle XH61V systems with 16 GB RAM and a dual core Celeron CPU
1 x NetGear storage system with 4 x 2 TB hard drives
Storage is still provided via iSCSI and NFS from the ReadyNAS
I have also installed a single 2.5″ hard drive in each host and will be adding a 32 GB mSATA SSD to each host so I can build out a VSAN config as well. The cluster is working perfectly right now and has not had a single issue.

Posted in ESXi, vCenter, VMware, vSphere, Vurtualization | Leave a comment

Script to Install Cacti on a CentOS or RHEL 6.5 host

I while back I wrote a post about this script and it had since broken as some updates to RHEL/CentOS and rrdtool caused the script to crash. I updated it this weekend and verified it using a CentOS 6.5 x64 minimal install in a VM. Worked fine so here it is. You can download it here as well.
 

# Cacti Install Script
# This script should work on all RHEL/CentOS 6.x systems but was built and tested
# on a CentOS 6 system installed with the minimal CD.
# I make no promises that this will work every time, if ever…
# Proceed at your own risk! I am not responsible for any mistakes or issues caused.
# This script has no error checking! Add some if you’d like.
# Feel free to share this, just please post a link back to my site giving credit
# where credit is due. Enjoy!
#
# By: Chris Adams
# linuxchris@gmail.com
# On: 6 Apr 2014
#
# Modify the password variables below to match what you want.
# You will also want to verify the rrd version prior to running.

MYSQLPASS=’MySQL1212′
CACTIPASS=’Cact1212′
CACTIVERSION=`wget -qO- www.cacti.net| grep “latest version” | sed ‘s/<[^>]*>//g’ | awk ‘{print $NF}’`
RRDVERSION=1.4.8
PKG_CONFIG_PATH=”/usr/lib/pkgconfig/”
CACTITMP=”/tmp/cactisql.tmp”
SERVERS=(“mysqld” “httpd” “ntpd”)
OFFSERVERS=(“iptables” “ip6tables”)

# Centos Minimal needs these added
yum -y install httpd php php-mysql php-snmp php-xml mysql mysql-server cairo-devel libxml2-devel pango-devel pango libpng-devel freetype freetype-devel libart_lgpl-devel net-snmp-utils gcc wget man make perl-CPAN perl-ExtUtils-MakeMaker perl-ExtUtils-MakeMaker-Coverage crontabs xorg-x11-fonts-100dpi xorg-x11-fonts-Type1 xorg-x11-fonts-75dpi

sed -i -e “s#^SELINUX\=enforcing#SELINUX\=disabled#” /etc/selinux/config

for i in ${OFFSERVERS[@]}
do
echo “Starting ${i}\n”
chkconfig ${i} off
service ${i} stop
done
#Turn onn and enable the needed servers to start at boot

for i in ${SERVERS[@]}
do
echo “Starting ${i}\n”
chkconfig ${i} on
service ${i} start
done

# Add teh fonts we installed to the font cache for Apache to use
echo “Upating Fornts for Apache Use, we dont want our Cacti to be ugly!”
fc-cache -vfs

echo “Now on to rrdtool”
# Download the latest rrdtool and store in /opt
cd /opt
wget http://oss.oetiker.ch/rrdtool/pub/rrdtool.tar.gz
tar -xzf rrdtool.tar.gz
cd rrdtool-$RRDVERSION
#Build and install rrdtool
./configure && make && make install
cd /usr/local
ln -s /opt/rrdtool-$RRDVERSION rrdtool

echo “MySQL stuff being done…”
#Set Mysql password for root
mysqladmin –user=root password $MYSQLPASS
mysqladmin –user=root -p$MYSQLPASS reload

echo “Finally… The Cacti stuff!”
cd /var/www/html/
wget http://www.cacti.net/downloads/cacti-$CACTIVERSION.tar.gz
tar -xzf cacti-$CACTIVERSION.tar.gz
mv cacti-$CACTIVERSION cacti
cd cacti
#Cacti SQL
echo “GRANT ALL ON cacti.* TO cactiuser@localhost IDENTIFIED BY ‘$CACTIPASS’;” > $CACTITMP
echo “flush privileges;” >> $CACTITMP
mysqladmin –user=root create cacti -p$MYSQLPASS
mysql -u root -p$MYSQLPASS cacti < cacti.sql mysql -u root -p$MYSQLPASS cacti < $CACTITMP rm -f $CACTITMP #Set the proper password for the Cacti DB user in the config sed -i -e "s/^\$database_password\ \= \"cactiuser\"/\$database_password\ \= \"${CACTIPASS}\"/" include/config.php chown -R apache:apache /var/www/html/cacti # Crontab entry for cacti (runs as root) echo '*/5 * * * * root /usr/bin/php /var/www/html/cacti/poller.php > /dev/null 2>&1′ > /etc/cron.d/0Cacti
echo “If there were no errors reported, everything should now be installed!\n”
echo “You will now need to reboot the server to apply the SELinux settings (or run setenforce).\n”


Posted in Automation, Linux, Scripting, Sysadmin | Leave a comment

MIA for a LONG time!

I just found a backup of this site on a backup disk I thought I had lost! With the backup found, I recovered the site and brought it back to life. I plan on posting regularly again. A lot has changed in the 2 years since my last post… Stay tuned!

Posted in Uncategorized | Leave a comment

MacBook Pro 8,3 Linux Success… Kinda

In my previous post about my frustration getting Linux installed on my 8,3 MacBook Pro I mentioned that I could not get an installer to boot. Well, with Open SuSE 12.1 I was able to finally get the installer to load and got Linux installed! Most things are working and the system is usable under most conditions. I have been unable to get the touchpad configured for right clicking and tap clicking although two finger scrolling does work fine. I am also unable to remove an external monitor without locking X. Just about everything else worked out of the box. I have bluetooth, great graphics performance, wired and wireless network, iSight cam, etc. I am thinking of trying a Fedora install as well… I’ll let you know how it goes.

Posted in Home Lab, Linux | Leave a comment

MacBook Pro 8,3 Linux Frustration

At my job one of the awesome perks (among MANY) is that I get a brand spanking new MacBook Pro. The machine is a maxed out 15″ with 2.2 GHz Core i7, 16 GB RAM, upgraded matte display and and amazing 512 GB SSD hard drive! The 1st thing I did when I got it was pop in an OpenSuse install DVD… No luck. Did not see the DVD drive for the Suse install. Sigh. So I then tried an Ubuntu CD (yuck). Ubuntu booted on the laptop but the wireless NIC drivers are very buggy and drove me nuts. After a few days of annoyances, I decided to stick with MacOS X for a few months until better hardware support comes around. Hopefully the fixes will roll in quickly!

Posted in Uncategorized | 1 Comment